How To Hem Leggings? Here Are The Cues To Get Started
by Susan T.
Are you looking for a complete guide on how to hem leggings? Fortunately, you have come to the right place! Hemming stretchy fabric isn’t always a cinch; the narrow leg opening of yoga pants isn’t easy to deal with.
We wouldn’t want to ruin their fabric since leggings are staple clothing and a little pricey. For this reason, thorough research about how to hem yoga leggings is a must. And the delightful news is that this post shares an extensive guide for you to try.
Below, we’ll cover the detailed steps on how to shorten your leggings without compromising the length you prefer. You’ll also discover some of the valuable tips and tricks to make the hemming process a breeze to carry out.
Without further ado, let’s start going over the rest of this article!

How To Hem Leggings With A Sewing Machine?
When sewing the hemlines of your leggings, you can select from two excellent methods, namely:
Twin Needle Hemming
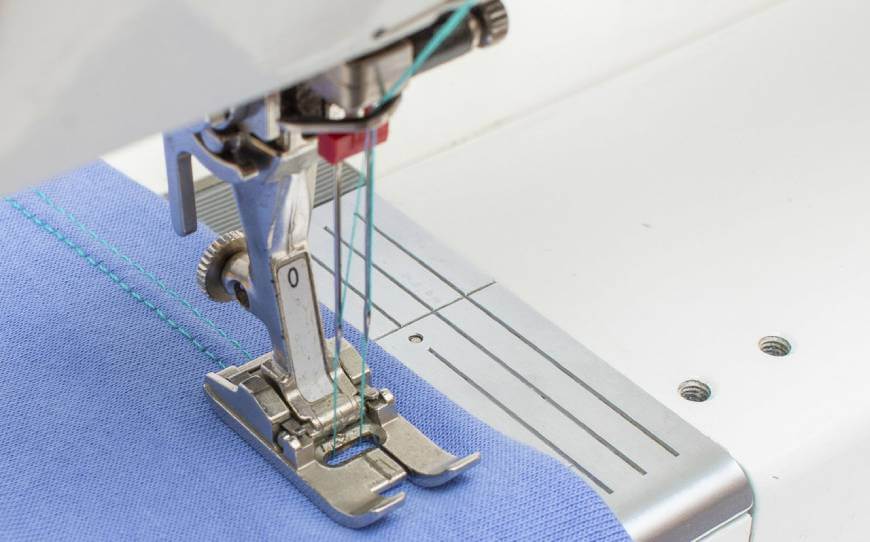
This option features a double-needle design that can sew stretch stitches in dual rows visible at the top.
Meanwhile, the bobbin thread works by sewing a zigzag stitch. There’s no doubt how ideal this technique is, but it has disadvantages.
If your leggings have thin fabric, tunnels and creases can form between the stitch rows instantly.
Indeed, if the stitch length is quite long, the seam is more likely to pop when stretched out.
Luckily, you can reduce tunneling by minimizing the bobbin tension or using a different bobbin.
Some people use water-soluble stabilizers to make the fabric flat. However, there’s a possibility that the crease will go back after washing the legging.
Zigzag Hemming
Zigzag is also ideal for sewing stretchy seams as it promotes stretchiness and makes the sewing process a lot easier. Moreover, your sewing machine can serve multiple functions that allow you to experiment.
Ideally, you can use a medium zigzag to keep the stitch length longer. We strongly suggest taking an extra piece of elastic fabric and testing it first. Observe if the seam pops when your stretch it out.
If the seam tends to pop, you’ll need to utilize broader stitches or shorter stitch lengths. Just continue your experiments until you reach the most favorable outcome.
How To Deal With Issues About Skipped Stitches?
You can solve this problem by using fresh needles designed explicitly for sewing spandex and lycra materials.
The most recommended brands you can check out include Super Stretch by Organ and Stretch by Schmetz. Their needles are excellent in reducing holes and skipped stitches in knit fabrics.
Hemming An A Coverstitch Machine
Using a coverstitch machine is better than using a sewing machine because it makes the seam appear tidier. It also promotes more stretchiness and keeps the fabric from stretching out by utilizing diverse feed settings.
How To Hem Your Leggings Using A Serger?

It’s essential to pin your legging to an appropriate length. From there, press it using an iron rod. Set the iron in an ideal temperature setting to avoid damaging the fabric.
Not to mention, you can discard the excess length if you find it useless to keep. Afterward, fold the new hem before hemming. Begin hemming near the folded edge to avoid leaving more space.
Detailed Guides To Hem Your Leggings
To get a clean-looking and smooth finish in hemming your leggings, you must follow the steps below:
Step 1: Pin at the Appropriate Length.
The suitable length depends on your preference and requirements. Before hemming, it’s critical to pin the right length to prevent any lapse.
Be sure to measure your length and pin it inside out before hemming. It’s worth noting that pinning with a narrow-legged opening is a bit difficult.
Step 2: Fold, Press, and Iron.
When pinning it, don’t forget to press the new hemline for your leggings. Use an ironing board to make this task more manageable, and put your legging above it. The iron should be warm enough, so set the appropriate temperature for your legging’s fabric.
Please note that the alignment should be even before ironing and pressing on the folded areas. Pressing the hem helps produce a cleaner look and forms a precise fold on your leggings.
Step 3: Remove the Excess Fabric.
Fold the excess fabric before hemming your leggings to prevent forming an unsightly bulge, and carefully cut it.
But, if you want to keep the excess length for future use, you may skip the cutting step. Cutting the extra fabric makes hemming more effortless, though.
Step 4: Fold and Press.
Folding and pressing the hem is beneficial. Hence, make sure to fold the leggings at the seams nicely. Do the same step on both sides.
If you want, mark it up for additional protection and have a precise fabric definition while hemming. Folding is necessary for putting the legging on a sewing machine or serger without disrupting the measurement.
Step 5: Hem it Close to the Edge.
The type of needle you use is essential to consider when hemming. The twin needle hemming is the standard option for stretchy knits and leggings.
This needle forms two rows of straight stitches on the topside and reverse portion, similar to a zigzag pattern. Most often, this pattern is usually seen on a legging’s hemming.
Meanwhile, some people pick skipped stitches that match spandex and lycra material nicely. Ultimately, selecting the correct hemming pattern and needle is crucial when hemming.
How To Hem Leggings Into Shorts?
It would help if you used a sewing machine, marking tool, and sewing tools to start the process. Wear your legging and pin the length you prefer by using a marking tool.
Depending on the allowance you want, draw a line a half-inch to one below. Please note that a one-inch mark is ideal for those who prefer a thick hem. After this, mark the hemline and cut the line on the legging.
Do the same for the other leg and cut the legs at the lower line. Then, cut through the cut line and carefully fold the hem up on the hemline and around the leg. Mark and fold the hem in place.
You may start sewing around both legs using a zigzag stitch near the edge.
Read more: Are you having a hard time looking for fitting leggings because of your thick thighs? Worry no more; here are the best options for you.
How To Hem Leggings By Hand?
Are you wondering how to hem leggings without a sewing machine? Hemming by hand is not a problem; here are your cues:
- Discard the current hemstitches and wear your legging.
- Fold the fabric with your desired length. To keep the folds in place, you’ll need to use pins.
- Take off your legging carefully to avoid disrupting the pins and secure the folds.
- With a marking tool, pin the parts where pins are placed.
- You may now remove the pins and carefully unfold the fabric. Be sure that it is stretched out on a smooth and level surface.
- Leave some allowance below the mark, approximately two inches. Afterward, you may remove the excess fabric.
- Mark the folded line again to keep it in place. You may now start sewing along with the cut and folded edge of the fabric. It’s vital to allow a gap roughly ½-inch from the edge.
- Lastly, secure the string into a knot and cut off the excess thread.
Read more: How Can You Ripped Leggings DIY? Tips And Detailed Step-By-Step Guide
How To Hem Lululemon Leggings?
We strongly suggest having a professional tailor to hem your lululemon legging for you. He is the best person to precisely hem according to your needs and preferences.
Typically, hemming takes a week to finish at a seasonal or showroom store. Hence, it’s best to contact your showroom or local store to get the full details of their service.
Read more: Fabletics vs Lululemon: A Detailed Comparison
Valuable Techniques For Coverstitching A Narrow Leg Opening On The Round
You can prevent blunders when hemming on a narrow leg opening around your leggings by:
- Provide allowance for the seam and fold it in the opposite direction. Fold the seams carefully to cover the needed legging’s definition and simplify hemming.
- Hand baste a hem with large stitches before placing it in the machine but avoid overlapping your stitching. To prevent lapses, put the basting right beneath the stitches.
- We recommend turning your legging inside out and stitching from the right side to make the stitching more straightforward. Meanwhile, do the opposite if you need to do reverse cover-stitching.
- Stitch from the inseam to prevent feeding disruption. Keep in mind that this largely depends on the kind of machine you’re using.
- Increase the feed setting if the hem begins stretching avoidably. Avoid pulling the hem when stitching, as this can damage the fabric.
- Opt for the pull method to make your stitches more durable and secure. You may overlap the stitches for roughly ½ inch.
Final Thoughts
Did you like our post about how to hem leggings? While not most of us know how to hem, it isn’t impossible with the right tools and steps. Getting the length you prefer is not that tricky, so long as you have basic sewing skills.
It’s not a problem whether you have a sewing machine with you or plan to do it by hand. But, of course, a machine does the work faster and more appealingly. The guides shared above help you make your hemming project a success!
Read more: Nylon Vs. Polyester Leggings: Which Is The Better Option For You?
 |
 |
 |
 |
 |
 |
 |
 |

About Susan T.
Susan T. is an internationally celebrated yoga teacher, but to her, it all started with a very basic motivation: she just really wanted to be able to touch her toes. Susan has come a long way since then- she now regularly leads yoga teacher trainings and workshops all over the world, and has been featured in Yoga Journal, Mantra Yoga, San Jose Mercury News / Health, and more. But Susan will tell you that her simple quest for flexibility has led her to so much more than just touching her toes.
Leave a Reply
Yoga Tips
Now get FREE Gifts. Or latest Free Yoga Mats here.
Disable Ad block to reveal all the secrets. Once done, hit a button below
 |
 |
 |
 |